


Rascal
Rascals are cheap and quick vehicles used for scouting, and raiding your enemy's economy. It is the fastest moving land unit in the whole game (except Armada's counterpart), but due to light armor, any damage will be lethal to it. Vehicles tend to have low sight range, and so rely on scouts to spot targets and stop them from running into ambushes.
Evade laser towers and destroy metal extractors & constructors to slow down your foe's expansion early in the game!
In T2 warfare, Rascals come as an effective counter to slow-firing units like Snipers, Starlights and artillery. When produced constantly and sent to the front, they can pull heavy fire on themselves while your T2 units engage enemy artillery.


Trapper
Minelayer vehicles have stealth and a mini-radar jammer. This means Minelayers can work safely in radar-covered areas, without being detected. They serve 2 main purposes:
Deploying 3 different types of landmines for defense, and destroying enemy landmines with a short-ranged seismic bolt attack
Minelayers can also lay Dragon's Teeth to block off areas or funnel enemies into landmines, and Perimeter Cameras for vision.
It's a cheap way to secure places where you don't have time to set up proper defenses, like your flanks. Always lay mines away from your opponent's line of sight, and avoid having your own units on the minefield.
Mines & Cameras are cloaked (hidden from sight) and have stealth (hidden from radar) until an enemy moves over one, but require energy to remain cloaked.
Use the Queue Command or Grid Building commands to easily place minefields. Use Grid spacing to cover a large area.
- Light mines instantly kill Grunts / Pawns
- Medium mines are the most cost-effective vs. heavier T1 and early T2 units
- Heavy mines' huge explosion radius can wipe out whole clusters of units
When grid-building mines, use the Build Split command. Hold SPACE to split the work among all selected minelayers (on default keys).
Minelayers can also Repair allied units, but only have 40 buildpower to do so. They cannot assist other construction in progress. Their bolt attack can damage enemies aside from mines, but is very weak and limited to a 90 degree frontal arc.


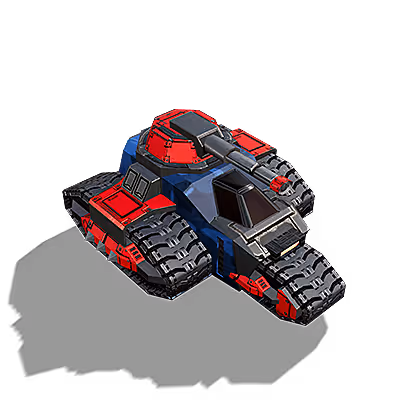
Incisor
The Incisor is a light, fast moving tank armed with a weak, but very precise laser weapon, accurate even when fired on the move. This makes it useful against fast lightly armored units, such as Pawn. A bit slower than its ARMADA counterpart - Blitz - but it has a higher range, so always try to keep distance.
Being very cheap to build and having high top speeds can be useful for scouting and taking down unguarded metal extractors and eco.
In late T1 warfare Incisors can be used in large numbers for ambushing Commanders and speedy skirmishing. Light armor and short range makes it susceptible to defensive towers and Riot tanks.
Their low sight range makes them prone to ambushes—keep Scouts with them.


Construction Vehicle
A construction vehicle is able to build basic T1 structures like the ones made by the Commander. Moreover it can build some more advanced land and air defense towers, advanced solar generators and most importantly the T2 Vehicle Lab. It is slightly faster and stronger than the Bot constructor, but it can not climb stepper hills, so it is effective only in expansion on relatively flat terrain.
Each Construction vehicle increases the player's energy and metal storage capacity by 50.
It is wise to use pairs of cons for expansion, so they can heal each other and build defensive structures faster. This makes them immune to light assault units like Fleas / Rover.


Lasher
Lashers are long-range light missile trucks. They can out range most T1 defensive units and deal constant damage.
They can also serve as basic anti-air defense thanks to its homing missiles—but they do NOT track ground units.
Very ineffective in close combat, so always try to keep them at full distance by using FIGHT command, avoid Blitz and fast infantry. In larger packs, Lashers can even take down Heavy Laser Turrets.
Combine with Pounders / Brutes and repairing units for a devastating front-line push!


Muskrat
The Muskrat is an amphibious construction vehicle, which can travel on land and underwater equally well allowing easy expansion between islands, under rivers and across seas. Its build menu includes some water based units like underwater metal extractors, tidal generators and most importantly the amphibious complex, a lab that includes T2 amphibious tanks and bots. As all amphibious units it can easily cross stepper hills unlike regular vehicles. It can be destroyed by torpedoes so avoid submarines, launchers and destroyers. It is wise to use pairs of cons for expansion, so they can heal each other and build defensive structures faster. This makes them immune to light assault units like Fleas / Rover.


Wolverine
Wolverine is an artillery vehicle used to take down T1 defenses, especially Heavy Laser Turrets. It can out range all T1 defense towers except coastal defense plasma batteries like the Gauntlet. Shooting its plasma shells along a parabolic trajectory they are obviously helpless in close quarters combat. Always keep them protected by Pounders / Incisors, or your own defensive structures. Don't forget to have targets in your radar's range or scouted.

Garpike
Garpike is a light amphibious tank which can travel on land and underwater equally well. It is weaker than most land based tanks, so to use it effectively avoid direct fire exchange and try to surprise your opponent by destroying undefended targets near the shoreline. Don't forget to send one or two amphibious constructors with your assault to reclaim left wrecks and claim metal spots on the way.
It has 80% EMP resistance, making it hard to counter them with Shurikens.


Pounder
The Pounder is a powerful tank armed with a 190 damage cannon with 72 area of effect, fulfilling its "Riot" role by easily destroying tightly-packed units. Its shots push lighter units (Pawn/Blitz etc.) away, potentially even knocking them off cliffs. It can fire every 1.8s.
Its cannon's high "impulse" rating can even cancel other tanks' momentum, stopping them in their tracks.
However, it moves very slowly and is unable to shoot over other units, unlike Brutes, so they should be used in a staggered line whenever possible. They are also highly vulnerable to skirmishers and artillery, and medium tanks outrange and outclass them in head-to-head combat.
That said, it's an ideal defensive fighter for locking down fast and light units, and is incredibly effective at guarding chokepoints.
Build Dragon's Teeth to make your own killzones—trying to push through a tight space guarded by Pounders is suicide.


Brute
Medium assault tanks form the armored core of T1 vehicle armies. They have very high HP for their cost, combined with solid damage, speed and range, giving them excellent all-around performance. They excel at open field engagements and assaulting lighter defenses equally well.
Combine with Lashers or Wolverines for a great front-line push, or use large packs alone for raiding enemy bases.
However, their slower turning speed leaves them vulnerable to a Commander's D-gun attack; Pop-up lightning turrets efficiently destroy them; and landmines can punish blind tank pushes. They are very costly to build in large numbers, so supplement them with other forces to deal with certain threats.
Even in T2, these tanks' well-balanced stats can still make them useful.


Omen
Omen is a mobile radar vehicle. Always have at least one in your artillery/infantry combos. It doesn’t have any weapon of its own and has rather low HP, hence always keep it a bit behind your other forces. It is cheaper than its Armada counterpart, but also way slower.


Obscurer
Obscurer is a mobile radar-jamming vehicle that can hide your units from enemy radar. They are very useful to limit the enemy's capability to strike beyond visual range. Do note they have a high energy cost and constantly consume energy to maintain the jamming field.
Use them to help in fights against enemy ranged units and artillery relying on radar - they can't shoot you if they can't detect you!
Be aware even a single hit will temporarily disable jamming ability.


Salamander
Salamanders are mid-weight raider tanks with accurate beam weapons. Amphibious capability lets them move on the seafloor, and also traverse hills at the same height tolerance as bots. Their power is not great, and falls off with distance, but their accuracy gives Cortex T2 vehicles a good option for dealing with faster units.
Use radar jammers near beaches to prevent enemies noticing Salamanders entering/exiting water.
Unlike Jaguars, Salamanders don't pack AA. Don't expose them to EMP drones or gunships!


Quaker
Quakers are heavy mobile artillery vehicles with an emphasis on breaking apart enemy formations. Though they fire slower than Mausers at 5s reload, they deal 420 damage in 72 AoE, making them more reliable vs. groups.
They are well-suited to shelling packed enemy formations from a long distance.
It moves very slowly and will be helpless alone, so be prepared to defend it with units or keep it behind your defensive line.


Fury
Fury is a mobile anti-air tank equipped with a rapid-fire flak cannon. Its weapon deals ludicrous amounts of AoE damage to aircraft, easily swatting T1 and most T2 aircraft that come into its vicinity.
Flak weapons have shorter range compared to other AA weapons, but are more effective vs. groups.
It doesn’t have anything to fight with against land units, so keep it covered.


Advanced Construction Vehicle


Tiger
As a wise Cortex Commander said, the Tiger is a brick with a gun. Try snapping a brick in half.
The Tiger is a general purpose heavy tank. Sporting a decent weapon and significant armor, Tigers are perfect for breaking through heavy fortifications and leaking into enemy bases at high speed, all while soaking up substantial amounts of damage.
Keep them repaired with Graverobbers.
It is cheaper and more armored than its ARMADA counterpart but it deals little area-of-effect damage and has little range for a T2 unit. Group them with Banishers to make up for this weakness.


Negotiator
A heavy missile truck with unmatched range within T2 mobile units. It shoots missiles along a high-altitude arc, enabling you to take down targets covered by walls and hilltops. Its awesome range make it a perfect siege weapon, able to quickly obliterate enemy defensive structures and destroy strategic targets like geothermal powerplants.
It is very costly, but its Stealth ability keeps it hidden from enemy radar!
Helpless against mobile units, always keep it protected by your infantry. A bit cheaper than its ARMADA counterpart, the Ambassador.
Its large AoE makes it useful vs. tightly-packed units. Try line-firing to spread them out and carpet bomb an area!


Banisher
Banisher Is a heavy missile tank. Its homing missiles have a long range and deal massive (1000) area (128) damage to both land and air targets, but with a long reload time that leaves them open to counterattack.
A good hard-counter for the Hound, since it cannot dodge the missile. Banishers can also soften up units that may outrun your supporting army, like the fast Jaguars.
The Banisher is also a flexible AA unit. It kills most T2 threats like Roughnecks, Stiletto & Liche in 2-3 shots, though it's important to point out that:
The Banisher prioritizes targeting ground units first.
Its slow turning speed can easily get it killed. When moving into range, remember to keep its broadside facing the enemy so it can turn around and run. Use sparingly as a first strike unit for a devastating opening punch.
Never rely on Banishers alone, and always support them with other forces.


Poison Arrow
Poison Arrow is a heavy amphibious tank with thick armor and a powerful AoE plasma cannon. Too expensive and slow to use alone, its niche lies instead in easily killing groups of units sent to counter amphibious assaults. In essence, it is an upgraded Pounder with much greater range and speed—yet it is still quite vulnerable to T2 skirmishers and assault tanks.
As an amphibious tank, it can climb hills just as well as bots can, letting it strike from unexpected angles.
Combine with other amphibious tanks and support units that can follow them underwater, such as Trashers/Manticores for anti-air coverage and Muskrats to repair units and reclaim wrecks.


Saviour
Saviour is a mobile anti-nuke missile system. It has a shorter range than anti-nuke structures, but you may move it around wherever you want. In late-game, it is very important to combine at least one with your army to prevent them getting nuked out of your territory.
Compared to the Umbrella, the Saviour lacks all-terrain capability, but has 350 more range (1750 vs. 1400).
It stockpiles 1 anti-nuke every 90 seconds, for 150 metal/6500 energy per shot.
You may wish to manually decrease its max missile stockpile to not waste resources.


Tzar
Tzar is a superheavy tank, equipped with a powerful AoE plasma cannon that can obliterate whole groups of units with one shot. It is very heavily armored and can take massive amounts of damage.
It defines a great use in an early T2 game.
Take it to the front covered by some AA units in order to push through the remaining T1 units and defenses like a hot knife through butter. Better try not to lose it, though, because it leaves very precious wreckage (894 metal).
Tzar is inferior to Banisher in range, but fires faster. It cannot see as far as it can shoot—ensure you have a spotter.


Tremor
The Tremor constantly fires high trajectory shells at an incredibly fast pace to carpet bomb whole areas, even over walls and cliffs.
Its attack range is one of the biggest among mobile units in the whole game. It is useful on maps with many natural barriers separating different sections and bases.
Use the terrain to your advantage - use the high ground to gain some extra range.
Tremors are an efficient counter to large amounts of slow, fragile units, such as Sharpshooters and Mausers, as well as hordes of light units, but are very vulnerable once anything gets close.
Tremors are a major friendly fire hazard! Always manually aim them!
Consider building Fortification Walls as bunkers to keep Tremors safe while they fire over the walls.
