

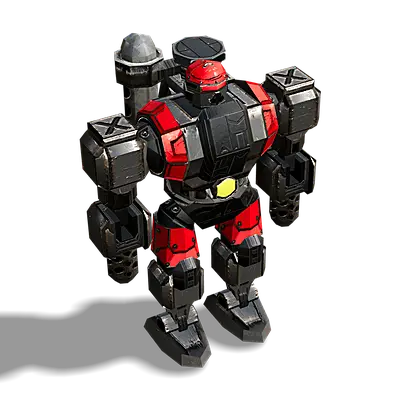
Cortex
Bots
Switch To


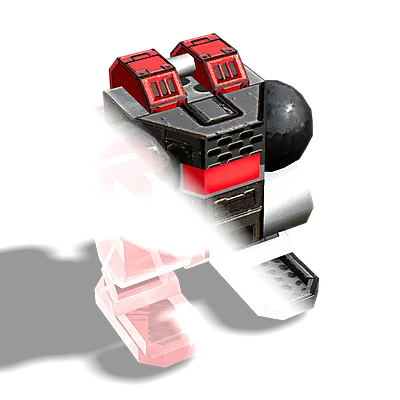
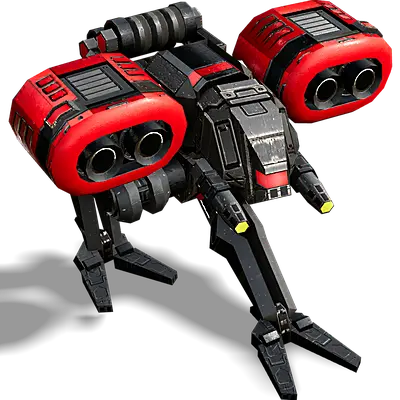
Grunt
T1
Fast Infantry Bot
Cost
Metal
Metal needed to build this unit
energy
Energy needed to build this unit
Build time
Build time needed to build this unit
general stats
health
Starting Hitpoints
speed
Max. speed on default and flat terrain
sight
Sight range to spot enemy units
dps
Max. damage per second for all weapons
range
Max. weapon range
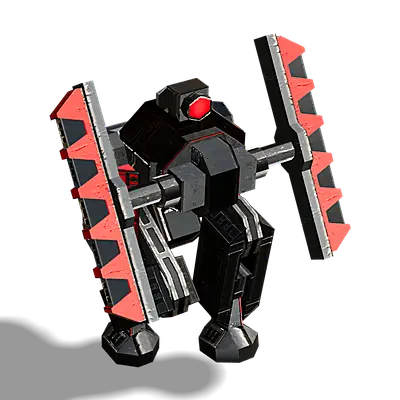
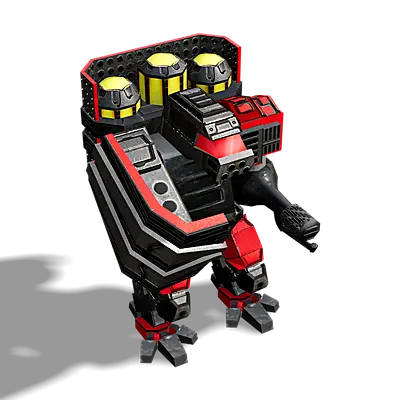
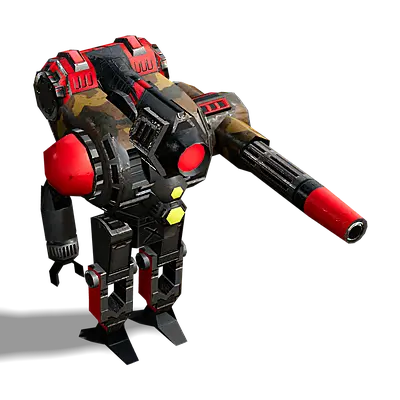
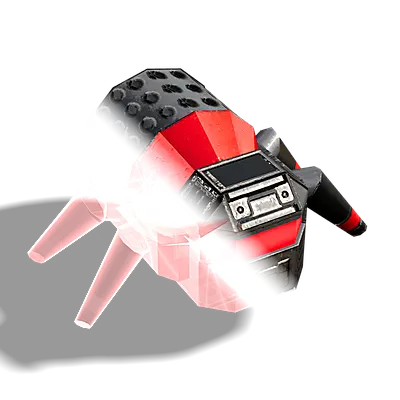
Aggravator
T1
Rocket Bot - good vs. static defenses
Cost
Metal
Metal needed to build this unit
energy
Energy needed to build this unit
Build time
Build time needed to build this unit
general stats
health
Starting Hitpoints
speed
Max. speed on default and flat terrain
sight
Sight range to spot enemy units
dps
Max. damage per second for all weapons
range
Max. weapon range

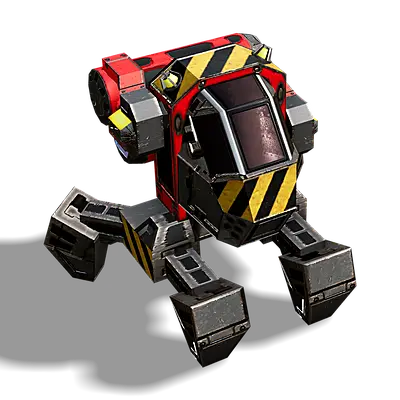
Construction Bot
T1
Tech 1 Constructor
Cost
Metal
Metal needed to build this unit
energy
Energy needed to build this unit
Build time
Build time needed to build this unit
general stats
health
Starting Hitpoints
speed
Max. speed on default and flat terrain
sight
Sight range to spot enemy units
Buildpower
How fast this unit can construct and repair
Trasher
T1

Amphibious
Amphibious Anti-air Bot
Cost
Metal
Metal needed to build this unit
energy
Energy needed to build this unit
Build time
Build time needed to build this unit
general stats
health
Starting Hitpoints
speed
Max. speed on default and flat terrain
sight
Sight range to spot enemy units
dps
Max. damage per second for all weapons
range
Max. weapon range
Graverobber
T1

Resurrector

Stealth
Stealthy Rez / Reclaim / Repair Bot
Cost
Metal
Metal needed to build this unit
energy
Energy needed to build this unit
Build time
Build time needed to build this unit
general stats
health
Starting Hitpoints
speed
Max. speed on default and flat terrain
sight
Sight range to spot enemy units
Radar
Radar range
Buildpower
How fast this unit can construct and repair
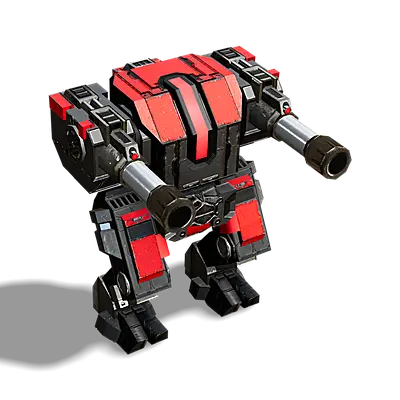
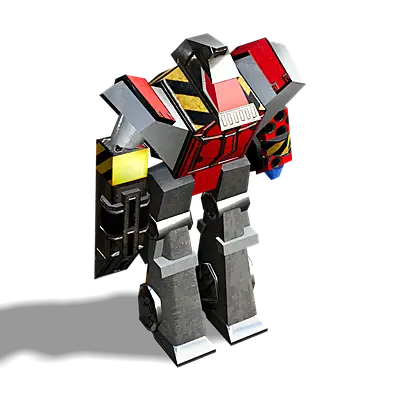
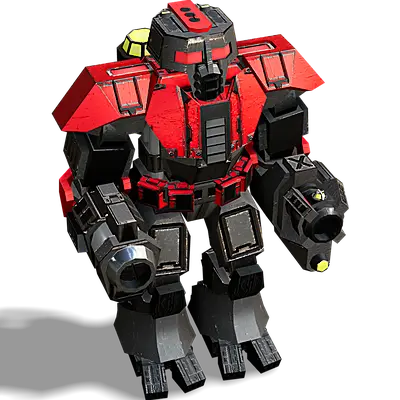
Thug
T1
Light Plasma Bot
Cost
Metal
Metal needed to build this unit
energy
Energy needed to build this unit
Build time
Build time needed to build this unit
general stats
health
Starting Hitpoints
speed
Max. speed on default and flat terrain
sight
Sight range to spot enemy units
dps
Max. damage per second for all weapons
range
Max. weapon range

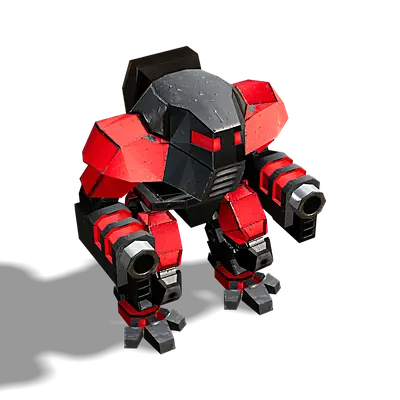
Cortex Commander
T1

Cloak
Amphibious

Capturer

Paralyze resistance
0
Commander
Cost
Metal
Metal needed to build this unit
energy
Energy needed to build this unit
Build time
Build time needed to build this unit
general stats
health
Starting Hitpoints
speed
Max. speed on default and flat terrain
sight
Sight range to spot enemy units
Radar
Radar range
Sonar range
Sonar range
Buildpower
How fast this unit can construct and repair
dps
Max. damage per second for all weapons
range
Max. weapon range
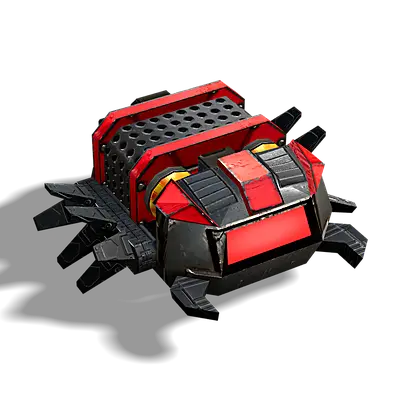
Bedbug
T2
Amphibious
Amphibious Crawling Bomb
Cost
Metal
Metal needed to build this unit
energy
Energy needed to build this unit
Build time
Build time needed to build this unit
general stats
health
Starting Hitpoints
speed
Max. speed on default and flat terrain
sight
Sight range to spot enemy units
Deceiver
T2

Jammer
Radar Jammer Bot
Cost
Metal
Metal needed to build this unit
energy
Energy needed to build this unit
Build time
Build time needed to build this unit
general stats
health
Starting Hitpoints
speed
Max. speed on default and flat terrain
sight
Sight range to spot enemy units
Jammer
Jammer range
Augur
T2
Radar Bot
Cost
Metal
Metal needed to build this unit
energy
Energy needed to build this unit
Build time
Build time needed to build this unit
general stats
health
Starting Hitpoints
speed
Max. speed on default and flat terrain
sight
Sight range to spot enemy units
Radar
Radar range
Spectre
T2
Stealth
Cloak
Paralyze resistance
0
Radar-Invisible Spy Bot
Cost
Metal
Metal needed to build this unit
energy
Energy needed to build this unit
Build time
Build time needed to build this unit
general stats
health
Starting Hitpoints
speed
Max. speed on default and flat terrain
sight
Sight range to spot enemy units
Buildpower
How fast this unit can construct and repair
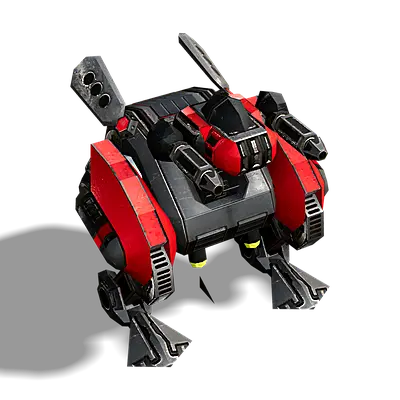
Fiend
T2
Fast Assault Bot
Cost
Metal
Metal needed to build this unit
energy
Energy needed to build this unit
Build time
Build time needed to build this unit
general stats
health
Starting Hitpoints
speed
Max. speed on default and flat terrain
sight
Sight range to spot enemy units
dps
Max. damage per second for all weapons
range
Max. weapon range
Twitcher
T2
Combat Engineer
Cost
Metal
Metal needed to build this unit
energy
Energy needed to build this unit
Build time
Build time needed to build this unit
general stats
health
Starting Hitpoints
speed
Max. speed on default and flat terrain
sight
Sight range to spot enemy units
Buildpower
How fast this unit can construct and repair
Duck
T2
Amphibious
Amphibious Bot
Cost
Metal
Metal needed to build this unit
energy
Energy needed to build this unit
Build time
Build time needed to build this unit
general stats
health
Starting Hitpoints
speed
Max. speed on default and flat terrain
sight
Sight range to spot enemy units
Radar
Radar range
Sonar range
Sonar range
dps
Max. damage per second for all weapons
range
Max. weapon range
Sheldon
T2
Mobile Mortar Bot
Cost
Metal
Metal needed to build this unit
energy
Energy needed to build this unit
Build time
Build time needed to build this unit
general stats
health
Starting Hitpoints
speed
Max. speed on default and flat terrain
sight
Sight range to spot enemy units
dps
Max. damage per second for all weapons
range
Max. weapon range
Advanced Construction Bot
T2
Tech 2 Constructor
Cost
Metal
Metal needed to build this unit
energy
Energy needed to build this unit
Build time
Build time needed to build this unit
general stats
health
Starting Hitpoints
speed
Max. speed on default and flat terrain
sight
Sight range to spot enemy units
Radar
Radar range
Buildpower
How fast this unit can construct and repair
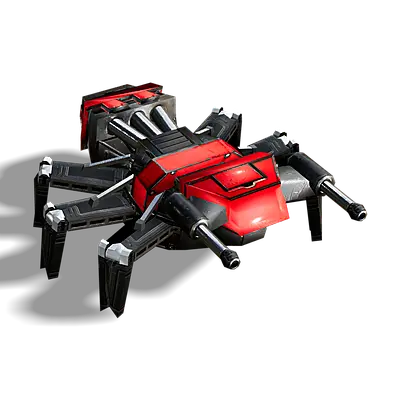
Termite
T2

All-terrain
Paralyze resistance
0.2
Heavy All-terrain Assault Spider
Cost
Metal
Metal needed to build this unit
energy
Energy needed to build this unit
Build time
Build time needed to build this unit
general stats
health
Starting Hitpoints
speed
Max. speed on default and flat terrain
sight
Sight range to spot enemy units
dps
Max. damage per second for all weapons
range
Max. weapon range
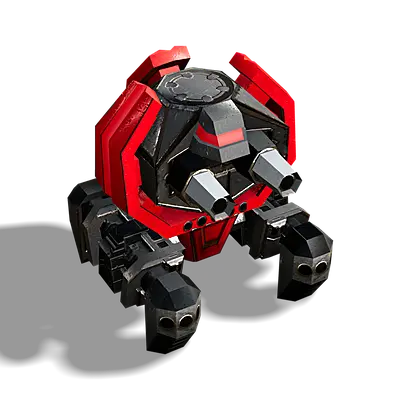
Sumo
T2
Armored Assault Bot
Cost
Metal
Metal needed to build this unit
energy
Energy needed to build this unit
Build time
Build time needed to build this unit
general stats
health
Starting Hitpoints
speed
Max. speed on default and flat terrain
sight
Sight range to spot enemy units
dps
Max. damage per second for all weapons
range
Max. weapon range

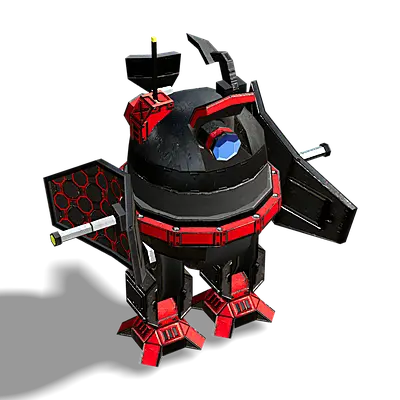
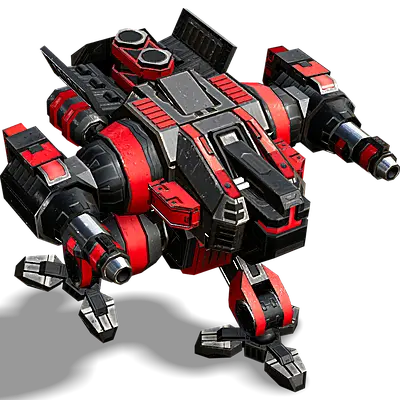
Arbiter
T2
Heavy Rocket Bot
Cost
Metal
Metal needed to build this unit
energy
Energy needed to build this unit
Build time
Build time needed to build this unit
general stats
health
Starting Hitpoints
speed
Max. speed on default and flat terrain
sight
Sight range to spot enemy units
dps
Max. damage per second for all weapons
range
Max. weapon range

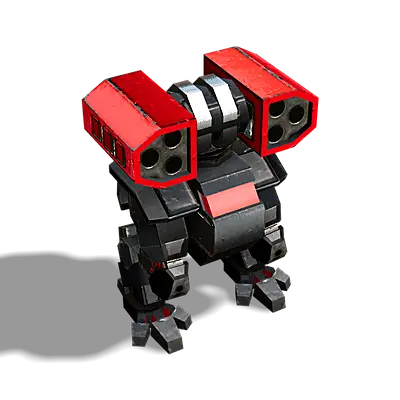
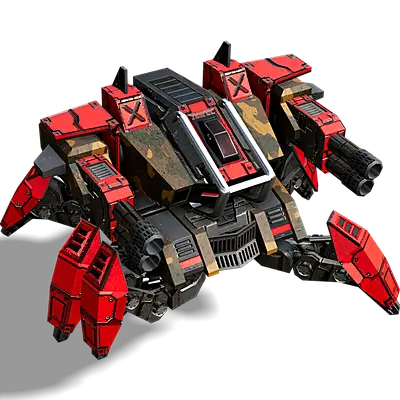
Manticore
T2
Amphibious
Heavy Amphibious Anti-Air Bot
Cost
Metal
Metal needed to build this unit
energy
Energy needed to build this unit
Build time
Build time needed to build this unit
general stats
health
Starting Hitpoints
speed
Max. speed on default and flat terrain
sight
Sight range to spot enemy units
dps
Max. damage per second for all weapons
range
Max. weapon range
Commander
T2
Cloak
Amphibious
Capturer
Paralyze resistance
0
Decoy Commander
Cost
Metal
Metal needed to build this unit
energy
Energy needed to build this unit
Build time
Build time needed to build this unit
general stats
health
Starting Hitpoints
speed
Max. speed on default and flat terrain
sight
Sight range to spot enemy units
Radar
Radar range
Sonar range
Sonar range
Buildpower
How fast this unit can construct and repair
dps
Max. damage per second for all weapons
range
Max. weapon range
Skuttle
T2
Cloak
Amphibious
Advanced Amphibious Crawling Bomb
Cost
Metal
Metal needed to build this unit
energy
Energy needed to build this unit
Build time
Build time needed to build this unit
general stats
health
Starting Hitpoints
speed
Max. speed on default and flat terrain
sight
Sight range to spot enemy units
Commando
T2
Jammer
Amphibious
Paralyze resistance
0.2
Stealthy Paratrooper Bot
Cost
Metal
Metal needed to build this unit
energy
Energy needed to build this unit
Build time
Build time needed to build this unit
general stats
health
Starting Hitpoints
speed
Max. speed on default and flat terrain
sight
Sight range to spot enemy units
Radar
Radar range
Jammer
Jammer range
Buildpower
How fast this unit can construct and repair
dps
Max. damage per second for all weapons
range
Max. weapon range
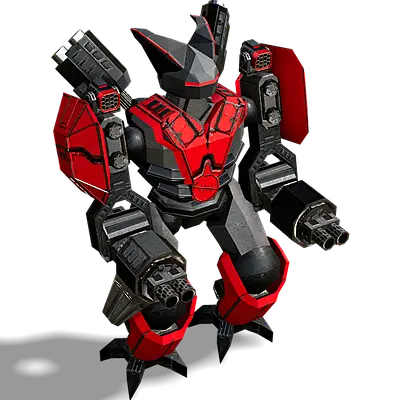
Mammoth
T2
Heavily Armored Assault Bot
Cost
Metal
Metal needed to build this unit
energy
Energy needed to build this unit
Build time
Build time needed to build this unit
general stats
health
Starting Hitpoints
speed
Max. speed on default and flat terrain
sight
Sight range to spot enemy units
dps
Max. damage per second for all weapons
range
Max. weapon range
Shiva
T3
Amphibious
Amphibious Siege Mech
Cost
Metal
Metal needed to build this unit
energy
Energy needed to build this unit
Build time
Build time needed to build this unit
general stats
health
Starting Hitpoints
speed
Max. speed on default and flat terrain
sight
Sight range to spot enemy units
dps
Max. damage per second for all weapons
range
Max. weapon range
Karganeth
T3
All-terrain
All-Terrain Assault Mech
Cost
Metal
Metal needed to build this unit
energy
Energy needed to build this unit
Build time
Build time needed to build this unit
general stats
health
Starting Hitpoints
speed
Max. speed on default and flat terrain
sight
Sight range to spot enemy units
dps
Max. damage per second for all weapons
range
Max. weapon range
Catapult
T3
Heavy Rocket Bot
Cost
Metal
Metal needed to build this unit
energy
Energy needed to build this unit
Build time
Build time needed to build this unit
general stats
health
Starting Hitpoints
speed
Max. speed on default and flat terrain
sight
Sight range to spot enemy units
dps
Max. damage per second for all weapons
range
Max. weapon range
Demon
T3
Flamethrower Mech
Cost
Metal
Metal needed to build this unit
energy
Energy needed to build this unit
Build time
Build time needed to build this unit
general stats
health
Starting Hitpoints
speed
Max. speed on default and flat terrain
sight
Sight range to spot enemy units
dps
Max. damage per second for all weapons
range
Max. weapon range
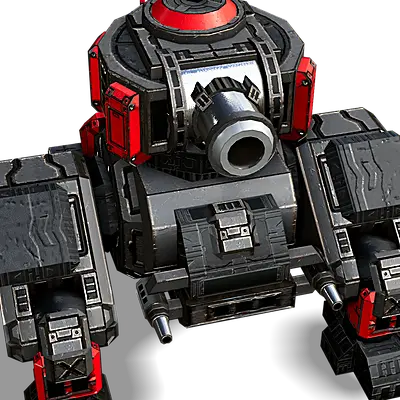
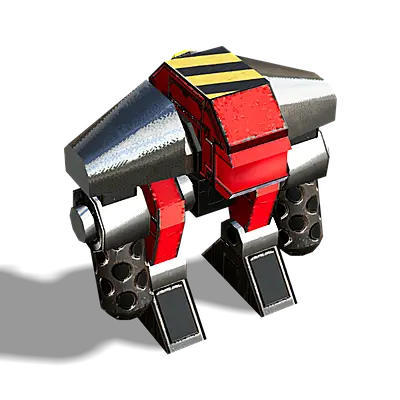
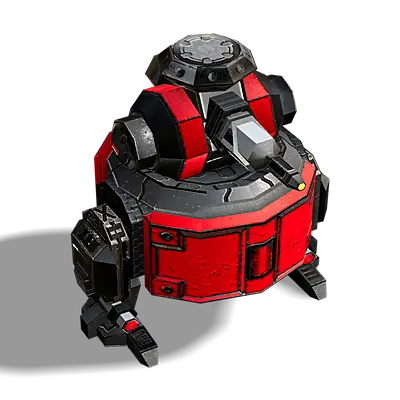
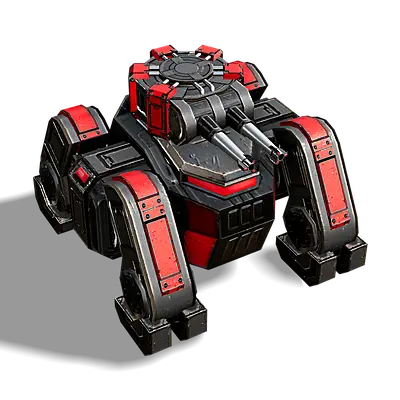
Behemoth
T3
Paralyze resistance
0
(barely) Mobile Heavy Turret
Cost
Metal
Metal needed to build this unit
energy
Energy needed to build this unit
Build time
Build time needed to build this unit
general stats
health
Starting Hitpoints
speed
Max. speed on default and flat terrain
sight
Sight range to spot enemy units
dps
Max. damage per second for all weapons
range
Max. weapon range
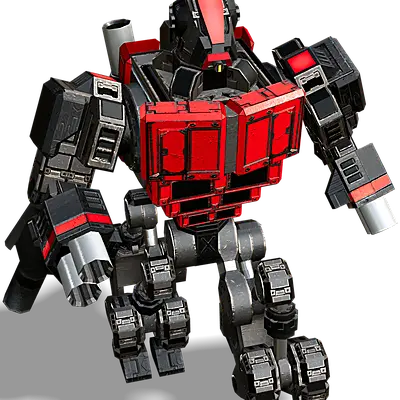
Juggernaut
T3
Amphibious
Paralyze resistance
0
Experimental Assault Bot
Cost
Metal
Metal needed to build this unit
energy
Energy needed to build this unit
Build time
Build time needed to build this unit
general stats
health
Starting Hitpoints
speed
Max. speed on default and flat terrain
sight
Sight range to spot enemy units
dps
Max. damage per second for all weapons
range
Max. weapon range


