Commands used in this guide
A compilation of some of the most important advanced mechanics in BAR. You will find most of them here, categorized in the below 4 groups. If you want to master your BAR skills, make sure to read them all.
Radar / Jamming / Cloak / Stealth

Radar & Vision
Radar accuracy
Shooting at units that are radar dots is inaccurate. Attacking units will miss most of the shots (this includes lasers and annihilators). Use cameras, spy-bots or units to get a visual on enemy units.
Radars do not see over physical barriers, place radars at the edge of high terrain (visible area is now shown while selecting radar position.)
Targeting Facilities
Targeting facilities cut radar accuracy penalties by half with diminishing returns—1 is 50% greater accuracy, 2 is 75%, and so on.
3 is good enough to help your long range fire find its mark.
In team games, Targeting facilities work for the entire team, so the entire team only needs 3 facilities to remove the radar wobble for everyone.

Anti-radar
Juno is described as “Anti Radar / Jammer / Minefield / ScoutSpam Weapon”. But what does it do, exactly? It can build and stockpile missiles, which need to be launched manually. These missiles destroy:
- All mines
- Radar & Sonar buildings (including floating & underwater), bots, tanks
- Radar jammer buildings, bots, tanks
- Scout units: Ticks, Rascals, Rover
- Perimeter cameras
- All of the above, also friendly
The area of effect lasts pretty long, about 25 seconds. When the green electric cloud dissipated, the effect is gone. Radar planes, Annihilators, Commandos, Spybots or other units with radar/jammer abilities are not affected.
It's great against minefields, lots of scouts that are spammed or to destroy radar or jammer installations.

Cloak
Cloak makes units invisible.
Cloaked units still have a radar signature! They can be shot at via radar, though it remains inaccurate without Targeting Facilities.
Cloak is temporarily disabled when a cloaked unit is too close to an enemy. Cloaked units are revealed as red blinking circles if in the range of Intrusion Countermeasure System (ICS) and an audible warning "STEALTH UNIT DETECTED" will be heard as well.
The ICS is motion-dependent - it will not ping with circles if a stealthed unit is not moving.
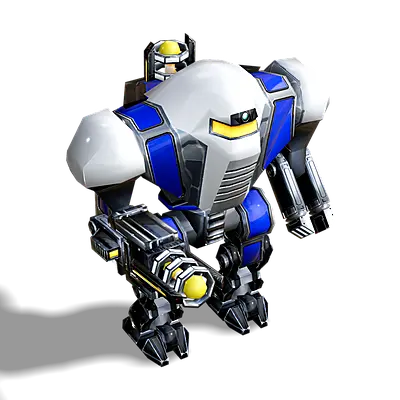
Commanders can cloak. This is often used to do a surprise D-gun attack.
Active cloak consumes energy. Cloaked units consume considerably more energy when moving while cloaked than they do when stationary.
You can use capture while cloaked. Shooting, building, repairing, or reclaiming will decloak.
Stealth
Some units like Minelayers, Stealth tanks and Resurrection bots have the Stealth ability, which conceals them from enemy radar.
Units with stealth can still be seen visually, but not by radar. The only units that have both are the Perimeter Cameras, Spy Bots (Spectre and Ghost), and the Gremlin Stealth Tank.
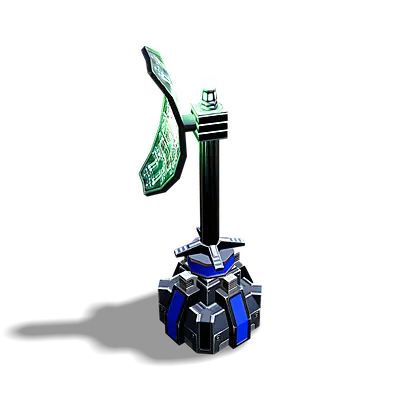
Perimeter Cameras

Built by any T1-capable mainline constructor (including Commanders) and minelayer vehicles, they provide solid visual range while remaining invisible from sight and radar thanks to its Cloak and Stealth. They can fit almost anywhere, including on steep terrain most units can't reach.
They're very useful for monitoring areas you really need vision over, and are especially good at defeating radar jamming.
For instance, try planting one to look over ground you are forced to evacuate, so you can have Line of Sight of the enemy units moving in and know exactly what they have. This gives you perfect shots with snipers & artillery on them, even if they bring a mobile jammer. If you're lucky, you may even spot stealthy Minelayers at work - radar would never spot them or their deadly landmines before it's too late!
While very cheap to build, be sparing with their use if you can.
A single camera consumes a lot of energy, roughly half a solar collector's worth of energy just to stay cloaked. This isn't such a problem mid- to late-game, when you may want whole networks of these set up to defeat radar jammers.
Weapon Characteristics
Laser drop-off
All laser units do only 50% damage at max range and 100% damage at zero range (linear decrease). This includes laser-like units like Pulsars and Beamers.

Flanking bonus
When a unit takes damage, it activates a 'flanking angle' pointing at the position of the unit that damaged it. Attacks within a narrow cone facing this angle deal normal damage. Further attacks from different angles will do proportionally more damage as the angle of attack approaches 180 degrees, up to 200%.
Fast units can run past enemies and be simultaneously attacking the front and back, which will do extra flanking damage. Flanking even gets calculated in 3D, meaning that higher shots from above and low hit from the ground also will introduce extra bonus damage, meaning that attacking with ground and air units at the same time will effectively do more damage.
Note that flanking damage applies to defenses and structures as well; surrounding a building with units will kill it much faster than usual.
Gunships have a natural tendency to strafe their target and strike from all sides, making them perfect examples of how deadly flanking damage can be.
Take advantage of terrain and fortifications to funnel enemies into firing brackets, shot at on two sides of their advance column at once. This "gnashing of teeth" triggers flanking bonuses that only get larger as the enemy closes and widens your firing angle, while they can only shoot at you from a very narrow one.
Such a force multiplier can effectively double the strength of your defending units and turrets if used correctly, especially helping to take down units with higher HP like medium tanks.
You can enable the Flanking UI icon in settings, to help you learn/see the effect.
High ground & ballistic weapons
Most weapons with ballistic trajectories -- virtually all cannons like Mace / Thug -- have increased range when firing from higher to lower elevation, clearly indicated by changes in their visible firing range circle. This makes them very dangerous when they can fire downhill, while hampering assaults up a ramp. T1 plasma bots and T2 mortar, in particular, are VERY dangerous when they secure a high ground advantage.

Lightning weapons
Lightning weapons do 100% to their target and then another extra 33% for Welder, Jaguar and Claw to 2 nearby targets (if available). Nearby means practically touching.
The T3 lightning tank Thor is different, and does 40% damage to 12 nearby units, and the range is almost 3x as large as the smaller lightning weapons mentioned above.
Multiple lightning units also get the flanking bonus from each other. The exact amount varies because the sequence and angle of the lightning arcs to nearby units will differ from case to case.
Tactical missiles
Tactical missiles are not shot down by anti-nuke. Same for EMP missiles. Both are very useful for attacking defensive players, because they have long range and there is no other counter than attacking with mobile units.
Bombers
Bombers are hard to master in BAR. They fire not one projectile, but a group of 5 in a straight line, indicated when you select the Attack command. Attacking enemy lines head-on is inefficient, while coming at a perpendicular angle so the bombs strike along their line is far better. The only cluster bomber is the Cortex Seaplane Bomber, which drops 8 bombs as a cluster, which also happen to bounce on water.
If you have good radar coverage, you can use Circle Attack, with A + left mouse button drag on all those nice radar dots.


Often the best way to use bombers, is to use Attack Line Command: Press A and right mouse button drag a line where you want your bombs to be dropped. This gives you more precise control over the area you want to attack.
Attacking a single unit is not wise, since bombers easily lose vision of their targets, and without a target they don't drop bombs.
Special Commands
Wait (W) command
When units are put on Wait, they execute no orders - they are paused - combat units won't move, constructors won't build until they're taken off of Wait. Used cleverly, this allows one to plan a series of movements and attacks well in advance, then execute them all at once.

One trick to making effective and accurate bombing runs is to use the Wait (W) command. Put bombers on Wait first, then give them individual orders to attack metal extractors, etc. When ready, take the bombers off Wait, and they will immediately execute the pre-calculated bombing plan. This eliminates having to either set each bomber in a row all at once, or adjusting their orders while already in flight.
This can also be used with missile launchers, tactical nuke launchers, and any other unit you'd prefer to fire in salvos and all hit desirable targets instead of needlessly overkilling things.
The Wait command is often used to temporary take pressure off your eco.
When you are stalling on one (both) resource(s), and you really need it somewhere, you can pause a few less important construction sites or factories by simply putting them on Wait. When you're back in the green, toggle the Wait command again to continue your paused projects.
Shot trajectory & velocity
Units with arcing shot trajectories (Stout / Brute) can shoot over obstacles, while direct-fire units (Pounder, Whistler, Lasher) may be blocked. If the enemy attacks in a way that blocks your direct-fire units from having a clear shot, you're in trouble. Some units have the option to change it's trajectory-mode between Low and High.
.avif)
Priority
Priority is a special setting on construction-capable units, factories, and some other things that use resources. When priority is High (green), resources will be preferentially given to tasks for that unit before those with Low (red) priority. When resources are tight, use this to speed up construction where and when it's needed the most.
Split orders with Space
Holding SPACE while grid-building (SHIFT + ALT) will split the total build order among all selected constructors. This can heavily reduce walking time between jobs, and greatly speeds up low-buildpower tasks like laying minefields and walls. Applies to minelayer vehicles which otherwise cannot assist-build each other, allowing multiple minelayers to grid-build an entire minefield in short order.
Split reclaim (E, then ALT + SPACE + Left mouse drag) will split the reclaim order among wrecks in the indicated area. Quite useful for reducing walking times.
Buildings / Defenses
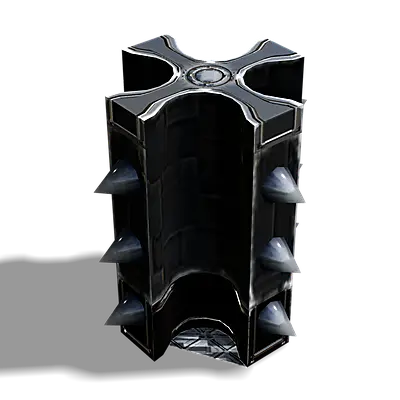
Dragon's teeth & walls

Extremely easy to overlook but can be very useful. Dragon-teeth stop Whistler/Lasher missile trucks and delays rocket bots sniping metal extractors, which are flat enough to hide behind them.
If Build Grid/Line Spacing (Shift + Alt + Z/X) is used, you can use 1 tap/tiny space to stop everything including the tiny Tick.
Use to make fences to stop fast units from just ignoring your defenses and army, having to spend time shooting their way through or going around. Getting in front of tanks before they get to your base is the difference between a lost game and a whole field of dead reclaim for you to scoop up.
Dragon's Teeth can be crushed by Bulls or Tiger heavy tanks.
These T2 units will simply path right through them and destroy the teeth. This does damage the tank slightly. The same applies for Shark’s Teeth (water fortification) and bigger ships.
In T2, Fortification walls have huge HP and are much taller.
T2 Fortification walls will block Sharpshooters / Starlights from just wiping whatever hides behind them.
Though Negotiators / Ambassadors will gracefully shoot over them. Probably too expensive to surround something completely, but still just fine for facing walls to stop direct fire.
T2 fortification walls are only crushable by the largest of the T3 units like Titans and Juggernauts.
When your walls/fences get damaged, you cannot repair them, but you can easily Reclaim to get a bit of metal back from them. Make use of the reclaim specific unit command (E, then ALT + Right click drag) to reclaim only D-teeth and walls in an area.

Plasma deflector mechanics
Plasma deflectors are not all-blocking energy shields. They only deflect cannon shots, nothing else. All cannons are plasma cannons, including things that are marked as just cannons (Pawn) and gauss cannons (Pit Bull).
All shots are deflected, not absorbed, and will bounce off the deflector.
This means that they still may hit something, especially if there is something next to the deflector bubble.
Plasma Deflectors do have a charge, which gets reduced every time something hits it. Charge acts as regenerating HP, and reduction rate depends on DPS.
Reclaiming your own (alive) buildings
Once you are generating enough energy with advanced solar collectors, you should reclaim your regular solar collectors, as they give a considerable amount of metal. Reclaiming windmills for metal isn’t generally worth it, but may be worth if you need space. Same for T1 energy converters.
Explosions

Building explosions
All buildings explode when they die. This can kill small/damaged units nearby (like Ticks, which have low HP and low range). Some buildings explode hard enough that they can kill nearby units and create chain reactions (metal makers, fusion plants, energy storage).
If you hold SPACE + X you will see 2 red rings that tells the explosion radius for death and a glowing one for self-D.
Blowing up your own units
You can self-destruct everything with CRTL+B. Units create a explosion when they are detonated, notable units that have self-d buffed explosion:
T1:
- Metal extractors: countdown 1 s, explosion big enough to kill a scout
- Twilight (Armada mex): EMP strong enough to stun medium tanks and up
- Energy storage: 1280 in 260 AoE, destroys most infantry and seriously damages light tanks, may even set ahead of time as self-D bomb (D-teeth for funneling?)
- LLTs - 5 s, big enough to kill a couple of T1 raiders
- Labs / Factories - 5 s, big enough to kill T1 most units
T2:
- Spies: 1 s, decent AoE EMP impulse
- Fiends: 1 s, high damage explosion 3-4 to snipe a commander
- Cortex tactical nuke - 5 s, super niche but it goes boom like a nuke
- Fusion plants - 5 s, very big explosion killing most units
- Crawling bombs - instant, always better to self-D then let it die, approximately 2x damage and AoE
T3:
- Juggernaut - 10 s, basically a Cortex nuke
- Titan - 10 s, powerful, like a Tactical nuke
Take advantage of self-destruction if a scout finds an undefended metal extractor, to kill the scout and stop it from killing anything else.
EMP/paralysis will interrupt self-destruct and pause the countdown until the unit(s) become un-paralyzed again.
Self-destructing a unit leaves no wreckage behind, which is useful for denying reclaim to your enemy, especially high metal cost units and those trapped in enemy territory.
There are a handful of exceptions that do leave a wreckage on self-D. The most important is the Commander, who leaves a 1,250 metal wreck behind.
In a team game with many commanders, it is often worth sacrificing some of them to get early metal advantage.
Terrain
Slope tolerance
All bots have greater ability to traverse rough, sloping terrain like hillsides than vehicles do. Vehicles often cannot go where bots can at all. Amphibious tanks & vehicles are a notable exception to this -
a T1 amphibious construction unit can go where a regular con can't, and amphibious tanks can attack where vehicles would never be expected to come from.
.avif)
Marine warfare
Submarines, and any unit or structure that stands on or traverses the ocean floor can only be detected via sonar
Floating radars have additional (short-range) sonar. Subs will simply pass beneath (land) radar undetected. Jamming will stop sonar from detecting submersed units. Subs have a subwake that can be spotted slightly beyond your line of sight.
When rolling amphibious tanks into water from a beach, it can be worthwhile to put a jammer on the beach so enemy radar will not see the tanks diving in.
Hovercraft can travel over water as well as land. Because they hover above the water's surface, anti-submarine weapons such as torpedoes cannot target them, making hovercraft good for clearing out defensive torpedo launchers. (which are partially above water).
Some buildings are built on the ocean floor, and require torpedoes or depth charges to destroy. Floating structures such as Tidal Generators can be targeted by everything from torpedoes to surface weapons.
Crawling bombs (Tumbleweed / Bedbugs / Skuttle) are submersible, and make exceptionally deadly weapons as they can skitter right into packs of ships and ocean floor units to detonate and kill many of them in one go.
Airlift units
Units carried by air transports are vulnerable to attack and cannot fire their weapons. Friendly units may be repaired even while in transit if constructors / nano-turrets are nearby. Enemy units will be automatically reclaimed by idle nano-turrets in range.
There are commands/shortcuts for the Load and Unload transport commands.
No unit can survive if the transport carrying it is shot down, except the Commando (Core T2 bot).
Some static buildings have the Transportable feature, most with the (Heavy) modifier. Notably, Nano-Turrets can be picked up and moved by air transports, which is highly useful for placing buildpower on the front line to reclaim and repair units. LLTs, anti-swarm towers (HLLT / Beamer), AA missile towers and T1 Radar towers can also be carried by a T2 heavy air transport or a ship or hover transport. This ability is often overlooked since it can be easier to just build new defenses on the front, but it does allow a player to instantly deploy defenses where they will be most effective, and move their perimeter at will.